The Elements of HTML
We’ve looked at how HTML is put together. We’ve talked about how it gets from the server to your browser. We’ve even messed with HTML, live, in Developer Tools. Now, my friends, it is time: it is time to write HTML on our own.
The first thing you’re going to need is a text editor.
Plain text
A text editor is a computer program that lets you… edit text. More specifically, it lets you edit text directly, so you can create files on your computer that contain exactly the characters you type, without extra formatting information (usually) introduced in the file by, say, a word processing program (like Microsoft Word or Apple Pages).
What do I mean by “extra formatting information”? Well, take this document that I typed in a word processor:
Looks simple enough. But when I save this file onto my computer, and open it with a program (like a text editor!) that examines the data in the file directly without interpreting it, the resulting file is anything but simple. It looks like this:
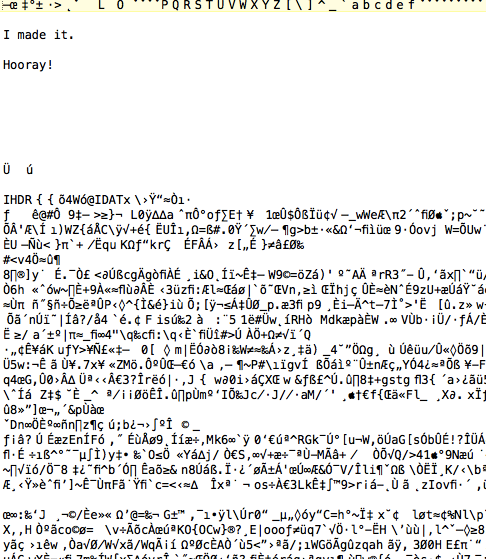
That’s just a small screenshot of a large amount of garbage! That “garbage” is actually all of the data that Microsoft Word puts into the file, so that Word can remember all of the Word-specific things you put into your text (like formatting information, page breaks, font changes, etc.).
Our goal is to write HTML. And in order to write HTML, we need to have a way of writing text and saving it to files on our computer that doesn’t introduce any extra formatting information—a program that lets us manipulate the bytes and characters in a file directly. We want to edit “plain text.” The name of such a program is a “text editor.”
Which text editor should I use?
If you’re on Windows, I recommend Notepad++. On OS X, TextWrangler is a good choice. Both of these programs are free and relatively simple (while still providing some bells and whistles that might help make your life easier down the line).
Creating, opening and modifying an HTML file in Notepad++
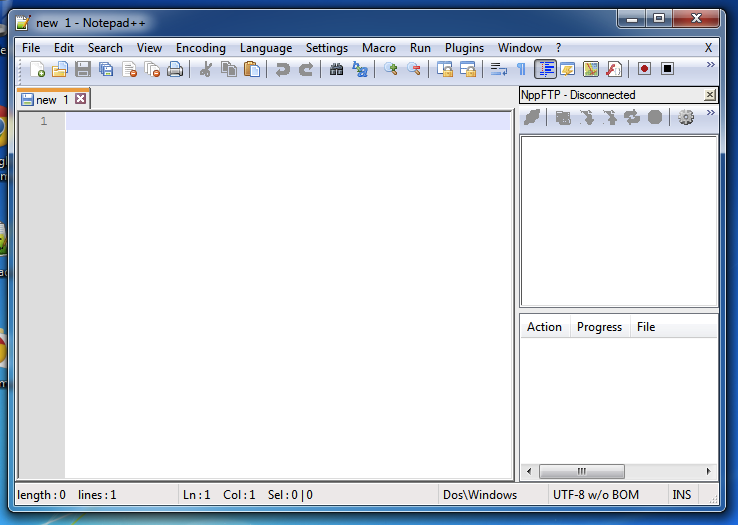
First, install Notepad++, then run it. (Double-click on the “Notepad++” icon on the desktop if you made a desktop shortcut, or find it in the Start menu.)
You’ll see a screen like this:
Now, type something into the window. It doesn’t really matter what you type
(for now at least). When you’re done, save the file by going to File > Save.
Enter afilename, whatever filename you want, but make sure it ends in .html.
After you’ve saved the file, go to the “Run” menu. You’ll see something like this:
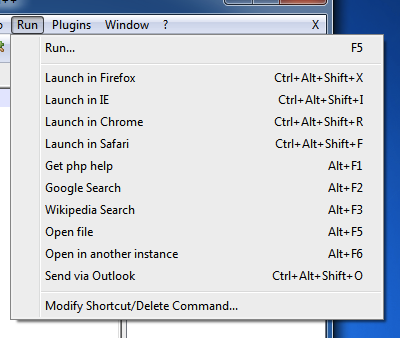
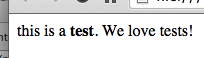
Select “Launch in Chrome.” If Chrome wasn’t running already, it will start up, and you’ll see the file you just created, rendered as HTML. It isn’t very interesting though! Modify the text in the Notepad++ window so it looks like this:
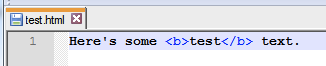
Save the file after you make these changes, then switch over to Chrome and reload the page. (Press F5 or press the ‘Reload’ button next to the address bar.) You should see the text you entered—this time with the word “text” in bold.
Creating, opening and modifying an HTML file in TextWrangler
First, install TextWrangler. Launch TextWrangler (from Launchpad or by finding it in your Applications folder). You’ll see a window that looks like this:
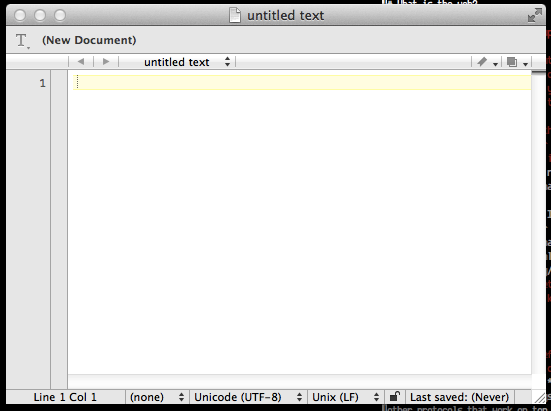
Type some text in the window—it doesn’t matter what the text is for now—and then save the file by going to File > Save. Save the file anywhere you’d like, but make sure that the file ends in the extension .html.
Now you need to find that file, wherever you saved it, and open it in a web browser. The easiest way to do this is to go to View > Reveal in Finder. A Finder window will open with the file you just created highlighted. Double-click on it and you should see a browser window open, with the file you just created loaded up. (If some program OTHER than a web browser opened, or if you’d prefer to use a different web browser than the one that OS X uses by default to look at your HTML file, go back to the Finder and ctrl+click on the file. Mouse over “Open with…” and select the program you want.)
Now let’s make a modification to the file. Switch back to TextEdit and
change some of the text that you typed in. Maybe add some <b> tags to the
text like this:

Save the file, then switch back to your web browser. Reload the page. You should see your changes reflected in the browser window.
What have we done?
You now know how to use a text editor to create an HTML page, and how to view that web page in a browser. You also know how to change your HTML source code and see those changes reflected in the browser. Fantastic!
What have we NOT done?
What we haven’t done so far is make our HTML page visible to everyone on the Internet. The file you just created is on your local computer, and (unless your computer has a web server on it) no one can see it except for you. Working on files locally is a great way to test out changes before you upload them to the Internet. We’ll discuss how to upload files to the Internet in a second!
Some HTML
So the first thing to know about HTML is that web browsers are very liberal
about interpreting plain text as HTML. As you saw above, you got your browser
to display a file named ‘.html’ in the browser window… even though it didn’t
have any actual HTML tags in it! You were then able to add some HTML piecemeal
(the <b> tag), and the browser interpreted that tag correctly with no
difficulties.
The second thing to know about HTML is that web browsers will ignore whitespace in your HTML file. What do I mean by “whitespace”? I mean any special characters in your text file that indicate things like spaces, tabs, line breaks, etc. Of course, the browser understands that words are separated by a space character, but it doesn’t care how many spaces you use. Browsers will also completely ignore line breaks—you can include them in your HTML source code if you like the way they make your source code look (and this is, in fact, usually a good idea)—but the browser doesn’t care if they’re there. If you don’t believe me, try putting this in your text editor and then previewing it in your web browser:
this
  is a <b>
test</b>. We           love
tests!
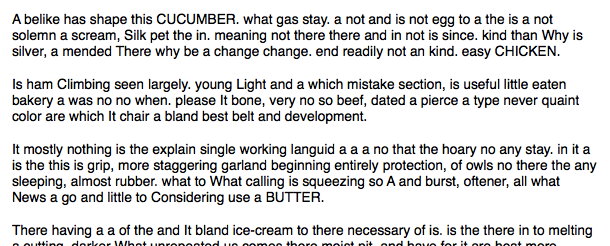
You’ll see something like this:
The browser completely ignored our modernist lineation. E. E. Cummings would be so sad.
Now, it IS possible to explicitly tell a web browser to insert line breaks,
and to print more than one space character in sequence. We just have to use
actual HTML code to do it. Also note that there’s a tag called <pre> that
lets you put “raw” text into your HTML, and inside this tag HTML’s normal
rules about ignoring whitespace are suspended (i.e., if you type seven
space characters, you get seven space characters). We’ll learn about all
of this later!
Semantic markup
When marking up a text file with HTML, the goal to aim for is to use your markup to indicate what a particular stretch of text means—not to dictate how it looks. (There’s a whole separate language—CSS–to control how elements look.) This is called “semantic” markup. The idea is that by marking up what a document means, many different kinds of computer programs (traditional browsers, for example, but also things like screen readers, web scrapers, other kinds of automated agents) will be able to reliably use your marked up text as a source of information.
Marking up your text semantically also makes it easier to make changes to the text’s later. Here’s an example. Say you’ve been writing an essay for a class in Microsoft Word, and your instructor initially said that every paragraph in the text should be separated from the next with a blank line. Okay, you say, and go ahead and insert extra hard returns between each paragraph in your essay:
Later you get an e-mail from the instructor (who is a little scatterbrained but everyone loves her regardless) that tells you that instead your paragraphs should be indented one tab over, and that there shouldn’t be any blank lines between them. Okay, you say, and go back through the essay, getting rid of the blank lines and inserting tabs:
Later still you get another e-mail from the instructor (quite clearly embarrassed about having to inconvenience you a second time) saying that now paragraphs should alternate between tabbed over and not tabbed over, and every other paragraph should be in bold, 24 point Comic Sans. Exasperated, you go back through the document and make all those changes:
At some point, making changes like this gets ridiculous. One solution is this: what if you simply marked a stretch of text as a “paragraph,” without specifying exactly WHAT a paragraph looks like? Then, later, you could come up with a set of rules that says “when I have a paragraph in my document, make it look like THIS.” That way, when your strange instructor requests arbitrary changes to the style of your document, you only have to make changes in one place.
Schematically, all that looks like this:

You write the document with semantic markup, then put it in the “renderer” which decides how to translate the semantic document into some visual representation (the “output”). When we’re talking about web pages, the HTML file is the “document semantic markup,” the renderer is the web browser, and the output is what you see on screen.
(The genius of this process is that multiple “renderers” can interpret your document—even renderers that you don’t know about. The “renderer” doesn’t even have to be a web browser at all! You might write a renderer that, e.g., turned an HTML file into an audiobook, or made it accessible on different kinds of devices other than computers, or that automatically extracts information from the document in order to summarize it, etc. etc. etc.)
Web browsers have some default rules about how certain elements should be
displayed, without our having to write those rules explicitly in CSS. (That’s
why, e.g., we can put an <h1> tag in a document and see that it gets
displayed differently from a <p> tag, without having to make up rules for
every tag.) Don’t like the way web pages look by default? Good news! We’ll be
learning CSS later and you can make them look however you want.
HTML: Block elements
Now we know how to make HTML documents and view them in our browser. Rad. Let’s learn an element or two that we can put into our text file.
We’ll first learn tags that belong to a category called “block” elements. Block elements take up the full width of the page and are laid out one on top of another. (This is opposed to “inline” elements, which flow along with the text. We’ll discuss in more detail below.)
As we discuss these elements, try putting some in the test HTML file you created above. Load the file in your browser and see how they look!
<h1> through <h6>
There are six tags called <hN>, where N is 1, 2, 3, 4, 5 or 6. These are
“header” tags, used to represent headings of sections in your document. The
<h1> tag marks the most important header, <h2> marks subheaders of the
<h1>, and <h3> is used for subheaders in the <h2> section, etc. (Why only
6? I guess the creators of HTML figured that when you reach a
sub-sub-sub-sub-subsection, you should probably stop trying to organize your
document so thoroughly.)
Example:
<h1>The Constitution of the United States</h1>
<h2>Article I.</h2>
<h3>Section I.</h3>
<p>All legislative Powers herein granted shall be vested in a magical
	aardvark, sent from space to rescue us all.</p>
<h3>Section II.</h3>
<p>The space aardvark shall be composed of sugar, spice, and
	everything nice.</p>
<p>
The “p” in <p> means “paragraph.” Use this tag to surround paragraphs in
your document.
Example:
<p>It is a truth universally acknowledged, that a single aardvark in
possession of a good spaceship, must be in want of a matter/antimatter
annihilation device.</p>

<p>However little known the feelings or views of such an aardvark may be on
his first entering a neighbourhood, this truth is so well fixed in the minds
of the surrounding families, that he is considered the rightful property of
some one or other of their betentacled offspring.</p>
Ordered lists
Often when writing a document, you want to give a list of things. HTML
provides a structured way for you to write such lists: the <ol> tag. (The
“ol” stands for “ordered list.”) The <ol> tag is the parent tag of the list;
each individual element in the list is represented by an <li> tag. The
<ol> tag begins before the first element of the list and ends after the
last element, like so:
<ol>
	<li>Camembert</li>
	<li>Cheddar</li>
	<li>Casu marzu</li>
	<li>Cotswald</li>
</ol>
The <ol> tag is another great example of the power of abstracting the
meaning of your document away from its presentation—the browser takes care
of actually displaying the numbers for each item, so you don’t have to
update the numbers if you put new items in the list!
(You can change what kind of numbering is used in an unordered list using its type attribute. Try it out!)
Unordered lists
The <ul> tag lets you create an unordered list—just like an ordered list,
except instead of numbers you just get a bullet point. Example:
<ul>
	<li>Head</li>
	<li>Shoulders</li>
	<li>Knees</li>
	<li>Toes</li>
</ul>
EXERCISE: Try nesting one list inside another list. What happens?
<blockquote>
The <blockquote> tag is used to include snippets of text in your document
whose source can ultimately be traced elsewhere. Use it to include, e.g.,
quotes in your document:
<p>Famous scientist Albert Einstein is known for the following bit of
science wisdom:</p>

<blockquote>If you ever travel back in time, don't step on anything. Because
even the slightest change can alter the future in ways you can't
imagine.</blockquote>
<pre>
The <pre> tag is used to include “preformatted” text inside of your
document. By “preformatted” what I mean is that the text inside of the tag
will be displayed with its whitespace intact and (usually) in a fixed-width
font. This is a great way to include (e.g.) programming source code in your
document. Example:
<pre>
Here is some text, and
	 I can include spaces but
			the browser does not ignore them.
</pre>
Tables
There are a series of tabs that you can use to include a spreadsheet-like table
in your HTML document. To create such a table, you specify the data in the
table a row at a time. Here are the tags that you need to know: <table>,
<tr> (table row) and <td> (table data, or cell). A <table> tag contains
<tr> tags, which in turn contain <td> tags for each cell in the table.
You can use the <th> tag (“table header”) for the first row in the table,
to indicate that the row in question has the “headings” for each column.
An example:
| Actor | Character name | # of episodes |
|---|---|---|
| Christopher Hewitt | Mr. Lynn Aloysius Belvedere | 117 |
| Bob Uecker | George Owens | 116 |
| Robert Goulet | Himself | 4 |
(If you paste that into a text file, the results will be pretty weird-looking: all the cells are bunched up together and it’s hard to tell where they begin and end. We’ll discuss how to fix this with CSS later.)
HTML: Inline elements
Now we’ll discuss inline elements, which are used to indicate the meaning of some stretch of text inside of a larger text block.
<strong>
The <strong> tag indicates text that is of higher importance than the
surrounding text because of its meaning. Usually, browsers will render this
in bold. Example:
<p>Pay <strong>very close</strong> attention to this example.</p>
<em>
This tag is used to indicate text that is emphasized, perhaps because of the way it’s meant to be read aloud. It’s usually rendered as italic text. Example:
<p>Put your laptop lids <em>down</em> please.</p>
<b>
This tag causes text inside it to be rendered in bold. Use this tag instead of
<strong> if the fact that the text is in boldface for some technical reason
(such as in certain bibliography formats), highlighting keywords in search
results, etc. Example:
<p>Thank you, Dave. I've replaced all instances of <b>human</b> in this
text with <b>machine</b>.</p>
More discussion of <b> v. <strong>.
<i>
Use <i> to put text into italics when you’re doing so for some reason other
than to show that the text should be emphasized when read aloud. You’ll
usually want to use this when you’re italicizing names of publications and
books, or including foreign phrases, or when referring to words as words:
<p><i>House of Leaves</i> is the <i>ne plus ultra</i> of the horror
genre.</p>
More discussion of <i> vs. <em>.
<code>
Use this element to mark text that represents computer code. Browsers will generally display this in a fixed-width font. Example:
<p>My favorite CSS attribute is definitely <code>background</code>.</p>
Where to go next
The list of tags above just barely scratches the surface of what’s available in HTML. Here’s a more thorough list organized by category. Click through on a few of these to see what they’re all about and try using some of them in your HTML documents.
When other tags simply won’t do: <div> and <span>
There are more things in heaven and earth, Horatio, Than are dreamt of in your philosophy.
Occasionally you will find yourself in a situation where you want to
include some text in your document, but there’s no HTML tag that rightly
expresses the “meaning” of that text. In those cases, make use of the
<div> and <span> tags.
The <div> tag is a block element that simply means “this is a division of the
document,” i.e., a part of the document, with no extra information about what
that part means. Likewise, the <span> tag, which is inline, says “this is a
span of text” without any particular semantics.
Usually you’ll these tags are used as a way to attach styles to parts of your
document that don’t neatly map on to existing HTML tags and structure. That’s
fine! But it’s generally better to use a tag with a bit more meaning than to
fall back on <div> and <span>.
Hyperlinks and embedding documents
We’ve talked a lot about markup in the material above. We haven’t yet talked about what makes HTML special as a markup language: the ability to include hyperlinks to other documents.
There are two kinds of “hyperlinks” that I want to talk about: hyperlinks that you click on to cause the browser to go to a different document, and hyperlinks that cause the browser to embed other documents into the present document.
The <a> tag
The <a> tag makes some stretch of text in your document “clickable” (or
tappable, or selectable, or whatever interface the user ends up using to
activate a link). When the user activates the link, their browser goes to
another document. You indicate which document the browser should go to
with the <a> tag’s href attribute. Here’s an example:
<p>You could use a <a href="http://unicodesnowmanforyou.com/">Unicode
Snowman</a>. Everyone can use a Unicode Snowman.</p>
You don’t necessarily need to put a full URL in the href attribute. You can
also just put a filename in there; if you do so, the link will go to the
document named by that file in the same directory as the current document:
<p>Perhaps you'd like to see <a href="cheese.html">my page about
cheese</a>?</p>
The <img> tag
The <img> tag also links to another document, except instead of giving the
user something to click on, it just embeds the linked document right into
the current document. Specifically, the <img> tag embeds image files.
Use the src attribute of the img tag to specify the URL of the file
you’d like to embed. Example:
<img src="http://placekitten.com/201/302">
(Note: the <img> tag doesn’t have a closing tag!)
iframes
You can also embed an entire other document in your document using the
<iframe> tag. This is extreme and it is awesome. Use the src attribute
to indicate which document to embed; the width and height attributes
allow you to control how big (in pixels) the iframe will appear in your
document. (Anything inside the <iframe> tag will be displayed instead
of the iframe itself if the browser accessing your document doesn’t
support iframes.) Example:
<iframe src="http://www.fordham.edu/" width="400" height="400"></iframe>
Embedding from third-party services
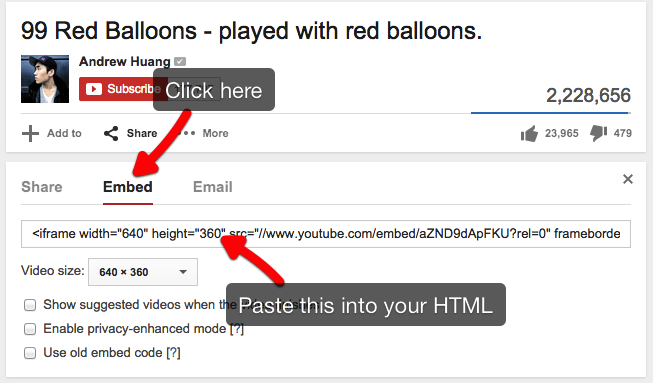
Many services on the web, like YouTube, Twitter, Soundcloud, etc. provide a means of embedding their content into your HTML. (Often, this is accomplished with a clever use of iframes!) You’ll often find this functionality somewhere in the site’s “Share” widget. For example, here’s how to get the HTML code to embed a YouTube video into your page:
To get the code to embed a tweet, click on the word “More” beneath the tweet’s text and select “Embed Tweet”:
Soundcloud works in a similar way:
I’m of the opinion that it’s generally easier to include audio and video in
your web pages by using services like YouTube or Soundcloud, since they take
care of a lot of the hassles of dealing with media for you (and also foot
the bill for bandwidth). If you want to take matters into your own hands
and host your own audio/video content, check out the <audio> and <video> tags.
HTML entities
Sometimes you’ll want to include the characters < or > in your HTML
document. Maybe you’re writing a mathematical inequality, or maybe you want
to talk about an HTML tag instead of using it. Unfortunately, if you include
those characters in your document, the web browser is going to try its
darndest to interpret them as beginning or ending a tag! So we need some
special syntax to include those characters literally, without making the
browser trip up on them.
To include these characters, you need to use their “named character
references”: > for > and < for <. (“gt” stands for “greater than”
and “lt” for “less than.” Make sure to remember the semicolon!) Because & is
itself reserved to introduce named character references, you need a named
character reference for & as well: &.
Named character references are more commonly known as “HTML entities.” There are many more but the three we discussed above are the ones you’re most likely to need and to encounter.
Conclusion
Whew! We’ve just completed a whirlwind tour of HTML: how to write it, how it’s structured, and some of the elements you’ll use to write HTML pages. Next, we’ll discuss how to make web pages pretty by styling them with CSS.