Using Chrome Developer Tools
Developer Tools in Chrome are an extremely powerful tool for figuring out how web pages work. Professional web developers use the Developer Tools to ensure that their code is doing exactly what they intended it to, and to debug their code when things don’t look quite right. We’re going to go over a very small subset of Developer Tools—just enough to get us into trouble.
Download Google Chrome
You’ll need to download Google Chrome to follow along with the rest of this tutorial. (Safari, Firefox and even Internet Explorer have similar “developer tools,” but they all work a little bit differently. You’re welcome to figure out how the developer tools in your browser of choice work, but in this tutorial we’ll be using Chrome.)
Download Chrome here. Note that you don’t actually have to “Sign In to Chrome” if you don’t want to—the browser will still work if you don’t.
Activating Developer Tools
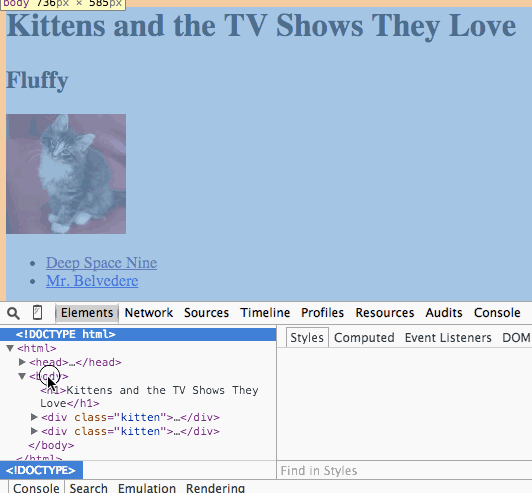
We’ll be using a particular web page to demonstrate the tools in this tutorial. If you want to follow along, go to the following URL in Chrome:
http://static.decontextualize.com/kittens.html
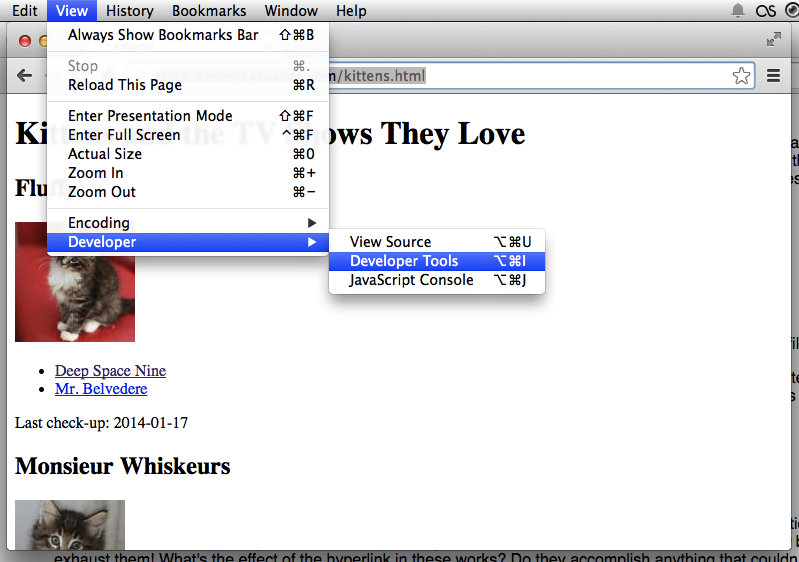
To launch Developer Tools, you can do one of two things. Either go to “View > Developer > Developer Tools,” like so:
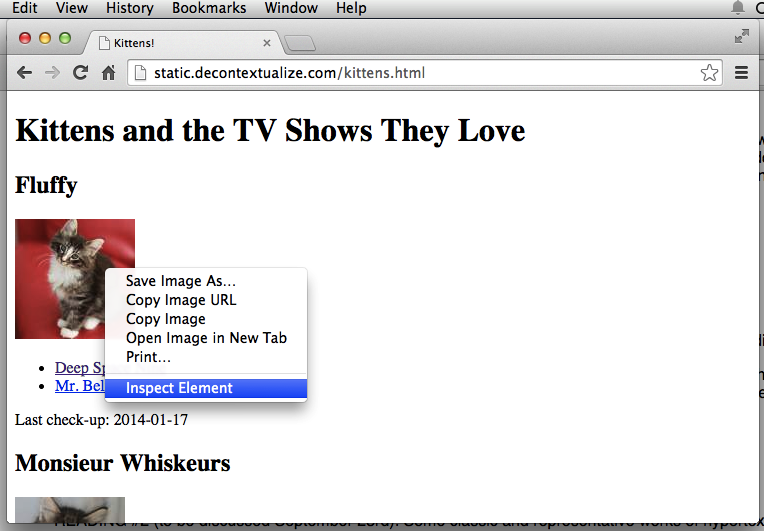
… or right-click (ctrl+click if you’re on OS X) and select “Inspect Element”:
In either case, you’ll end up looking at a screen like this:
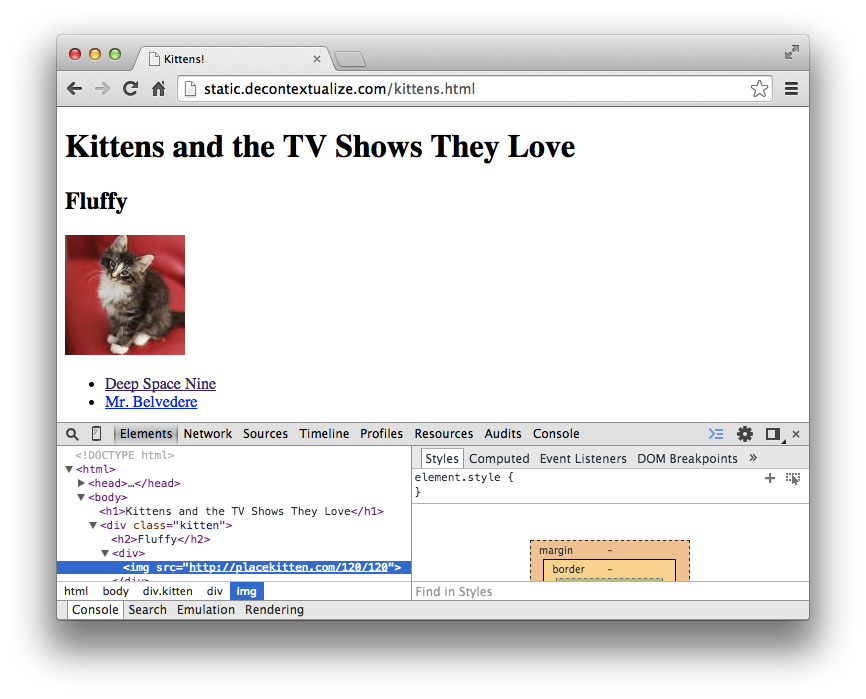
All of that stuff at the bottom of your browser window is the Developer Tools. As I said above, there’s a LOT of stuff you can do with Developer Tools, and it’s easy to get lost or confused if you click around too much. (You won’t break anything even if you do get lost or confused, though, so don’t worry.)
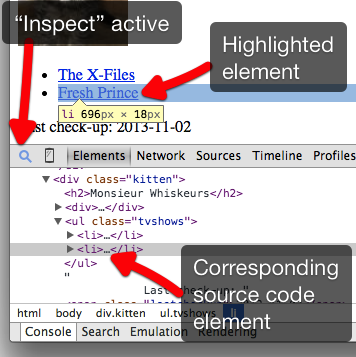
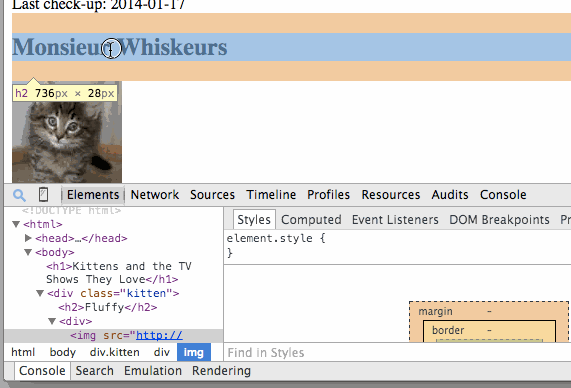
The following image provides an annotated view of Developer Tools, naming some important parts.
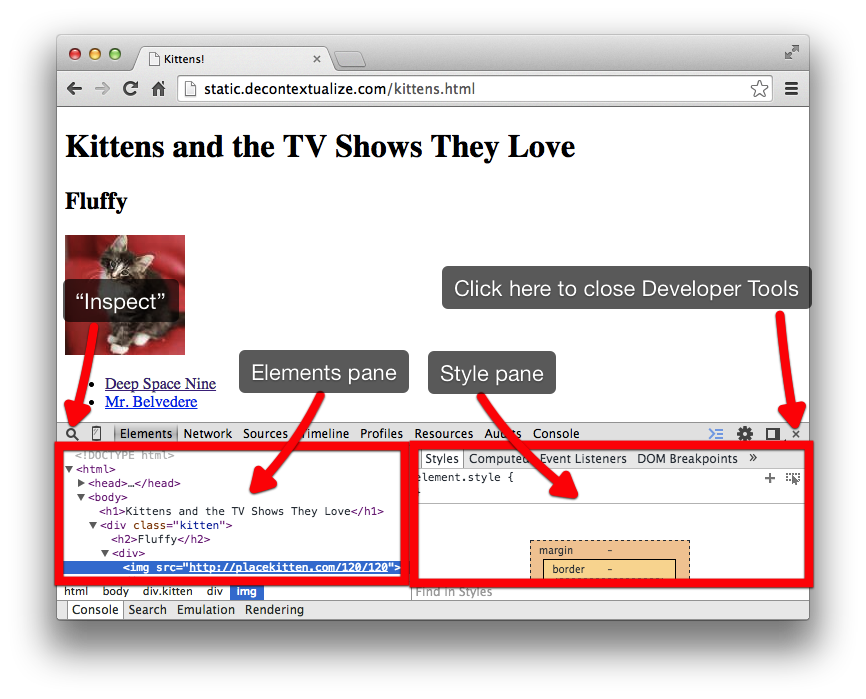
Here’s some information about each part.
- Click the “Inspect” icon to select an element on the page (in the upper pane). We’ll talk more about this functionality below.
- The “Elements pane” shows you all of the elements in the page. You can mouse over an element to highlight in the top pane where that element is on the page. You can also use the triangle icon next to each element to expand or hide all of the elements that are “children” of that element.
- The “Style pane” shows you all of the CSS styles that apply to the currently selected element.
- You can click the “X” in the upper right-hand corner of Developer Tools to dismiss Developer Tools from your browser window.
Inspecting elements
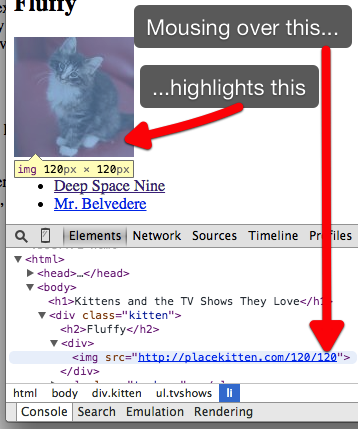
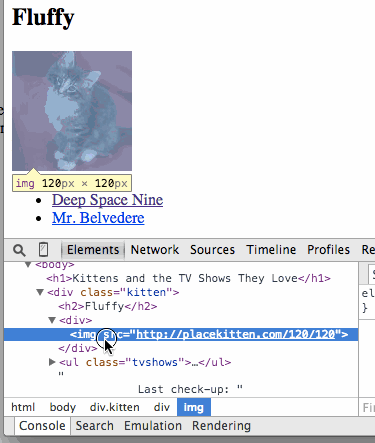
One of the main useful things that Developer Tools does for us is help us figure out which parts of the HTML source code correspond to which parts of the on-screen layout (and vice-versa).
To locate the part of the source code that corresponds to an element on screen, click on the “Inspect” icon (the little magnifying glass) and then mouse over the element on the screen that you want to find. Click on the element, and its source code will be highlighted in the Elements pane below.
Also, while Developer Tools are open, mousing over any part of the Element Pane will highlight the corresponding part of the page layout in the upper pane.
Doing things with elements
Once you’ve highlighted an element, there are a number of interesting things you can do with it! Here’s a rundown.
Deleting elements
To delete an element (thereby removing it from the page), select it using the Inspect tool (or by clicking on it in the Element pane). Once it’s selected, hit “Delete” on your keyboard. (You can also right/ctrl-click on the element and select “Delete Node” from the drop-down menu.)
Modifying an element’s contents
It’s easy to change the actual text inside an element! To do so, select the element whose text you want to change, then double-click inside of the tag. Now you can modify the element’s text to say whatever you want! Hit Enter to confirm your change.
Changing the source of an image
You can modify any part of the HTML source code in the Developer Tools, not just the content of tags. For example, you can modify the src attribute of an
image element—causing the element to point to a different image entirely!
Let’s say we wanted to replace the picture of one of these kittens with
this picture of famed actor Tony Danza.
To accomplish this, select the element whose attributes you want to change. Double-click on the attribute in question, as it’s displayed in the Element pane. You can then edit the element in a text field. Highlight the existing image URL and replace it with a different URL. Hit Enter to confirm your change.
Modifying styles
The “Style pane” in the lower right-hand corner of the Developer Tools allows you to change the “style” of elements—i.e., they way they look on the screen. Even if you’re not fluent in CSS, you can still be pretty effective in making changes within Developer Tools.
To modify an element’s style, select it using the “Inspect” tool or by clicking on it in the Elements pane. The Style pane now shows you all of the CSS styles that apply to the currently selected element. Developer Tools allows you to modify these styles!
There are two tricky things to remember here: first, CSS has its own syntax and rules, different from HTML. I’m going to show you some of the most interesting (and fun?) CSS properties below; here’s a list of others that you might want to explore.
Second, CSS styles can apply to individual elements on a page, but they can
also apply to whole “categories” of elements on the page. By “category” here
I mean several different things. A single CSS style definition can determine
the appearance of every element with the same tag name, or every element that
has the same value for a particular HTML attribute (commonly the class
attribute), or every element in a particular hierarchical relationship with
another attribute, etc. To make it more complicated, more than one style can
apply to a particular element, based on its membership in multiple categories
simultaneously! The rules for all of this can be confusing.
The Style pane shows all of the CSS style definitions that apply to the element you’ve selected. When you’re just messing around and trying to cause trouble, my advice is to click on whichever style definition looks interesting and make a change—experiment and see what happens.
The style named element.style, however, will only ever modify the individual element you’ve selected. Let’s add some CSS attributes to element.style in
our test document:
To add a style to an element, click inside the curly brackets ({})next to element.style. Developer Tools gives you a tiny text field with nothing in it; you need to fill in the name of the CSS attribute you want, hit : when you’re done typing the name, and then type the value for the attribute. In the animation above, I demonstrate a few CSS attributes. Here’s a rundown:
color: Controls the color of the element, in particular the color of its text. CSS recognizes a number of English words for colors, or you can specify them more using more precise syntax.background-color: Same ascolor, but controls the background color of the element.font-family: Controls the font used for the element. In Developer Tools, you can set this to the name of any font you have installed on your computer. If the name of the font has spaces in it, make sure to enclose it in quotes.font-size: Sets the size of the font. You can’t just put a number in here—it has to have some kind of unit, probablypt(for “points”) orpx(for “pixels”). Once you’ve set a font size, you can adjust it up and down using the “up” and “down” buttons on your keyboard, as long as the text field has focus. (Use Shift+Up and Shift+Down to change the number by a larger increment.)background-url: This allows you to set the image for the background of an element (instead of a solid color, as withbackground-colorabove). The value of this attribute needs to take the form ofurl(X), replacingXwith the URL of the image you want to use.width: Demonstrated below, controls the width of the element in question. This is most interested with elements that have a visible rectangular layout, like images.
Once you’ve added a style to the Style panel, you can de-activate it (without deleting it) using the checkbox off to the left of the style. The following
animation demonstrates changing the width CSS attribute of an element and switching that attribute on and off:
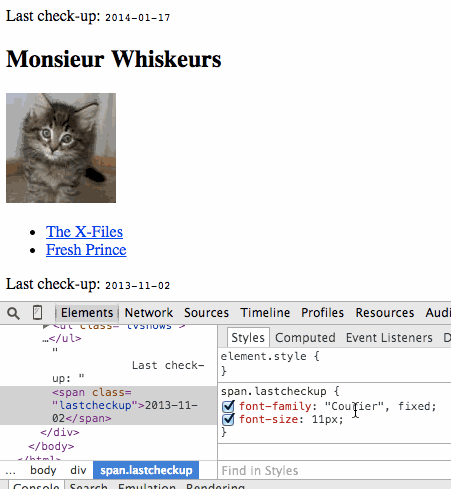
Modifying styles for a category of elements
As mentioned above, some CSS styles apply to a category of elements, not just
a single element. In our Kittens page, for example, there’s a style applied
to all span tags with a class of lastcheckup. (Don’t worry if you don’t
know what a span tag is, or what a “class” is, for now at least.) If more
than one style definition applies to an element, you’ll see all of the
style definitions in the Style pane. If you make a change to a style that
applies to more than one element, all elements that the style applies to
will be changed. For example, we can change all of the “last checkup dates”
on the page by modifying the style in one place, like so:
Modifying EVERYTHING on the page
CSS styles have an interesting property, which is that elements “inherit”
styles from their parents. (More detailed explanation here.) We can take advantage of this fact to make
changes to the style of all of the elements on the page. How? By changing the style of the body tag—a descendent tag of all other elements in the
document.
To do this, find the body tag in the Elements pane. (It’ll be somewhere near
the top.) If there’s already a style defined for body, you’ll see that style
in the Style pane to the left. If no style has been defined previously, you can
just edit the body element’s element.style style. In the animation below, I
add a text-shadow
style to the body element, thereby giving a drop-shadow to all text on the
page.
Note: The body element trick only works if the style you add isn’t
subsequently defined for the element elsewhere in the stylesheet. For example,
if you set the font-family in the body element, but an element further down
on the page has the font-family set already, the more specific definition
takes precedence.
Things to try
Now you’re a regular Internet vandal. (Well, a vandal with some severe limitations—the changes you make in Developer Tools, of course, only happen on YOUR computer, and even then they only last until you reload the page.)
Here are some exercises for you and the tiny Internet Banksy that grows, even now, inside you.
(1) Go to a site with ads, maybe ads that you hate. Use Developer Tools to delete the ads, one by one. Do this with great delicacy, making a popping noise with your lips as each one disappears.
(2) Go to a favorite web site of yours. Change the copy so it says something different. Something outlandish, or banal, or complementary about you, perhaps.
(3) Check out this list of CSS properties and pick a few that seem interesting to you. (The “Box Model” and
“Positioning and Display” categories in particular have some interesting and juicy stuff.) Make modifications to first to kittens.html with your new-found CSS property friends, then with some other sites on the Internet, if you’d like.
Remember to take screenshots of your creations, and share!