A Quick Twine Tutorial
Download Twine here. This tutorial is about Twine 1.4. (Twine 2.0 is great, but even though it’s out of beta, it’s still missing some features. I suggest sticking with Twine 1.4 for now.)
A Twine game is made from “nodes” (or “passages”; in fancy hypertext terms, we’d call these “lexia”) and links between them. The application’s interface represents each node as a box, and links between nodes as arrows from one box to another. This is helpful for understanding and keeping track of the structure of your game.
Your first story
When you start Twine for the first time, it looks something like this:
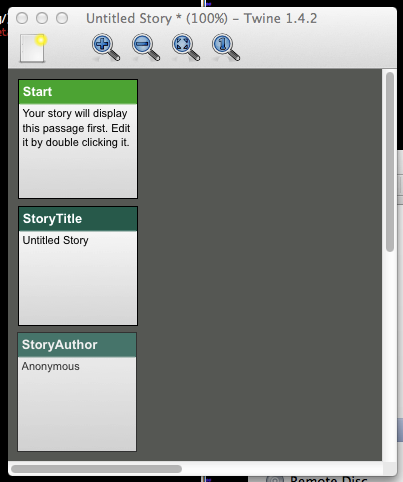
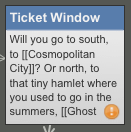
The “Start” passage is where your story will begin. Double click on it to edit the passage. Start with something like this:
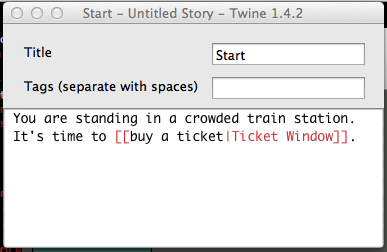
The weird text in the [[ and ]] is a link. The text to the left of
the pipe character (|) is the text of the link, and the text to the
right of the pipe character is the name of the passage you want to link to.
We haven’t made any other passages, however. When you close the window that allows you to edit the passage, Twine will helpfully ask you:
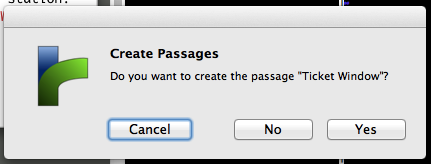
Click “Yes.” Now your story looks like this:
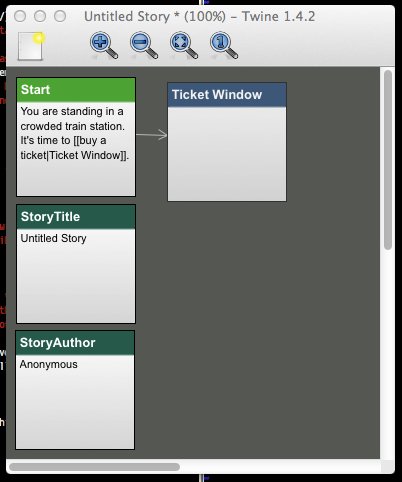
Now you can double click on the new passage to add some text. You can add links in here as well:

When you close this window, Twine will once again ask to create the passages
that you’ve referenced. Click “Yes.” Note that if you don’t include a | in
your link, Twine will assume that the text of the link is also the name of the
passage that you want to link to. Now your story should look like this:
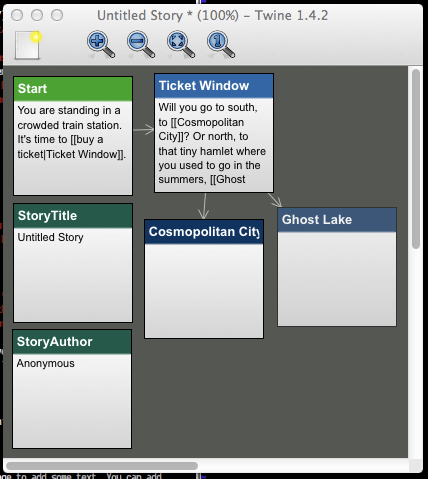
Now go back and add some text for the new links you created.
Testing your game
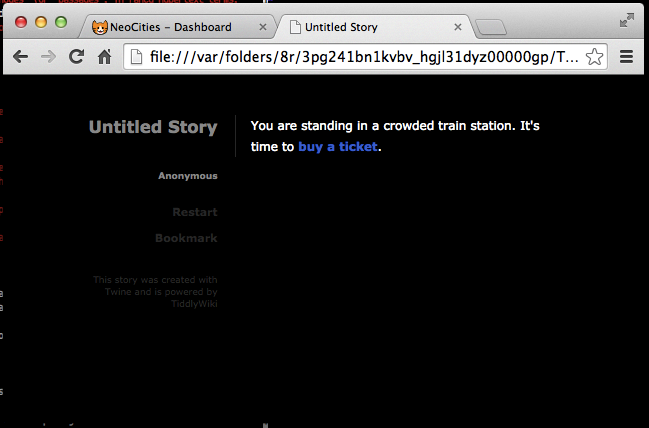
Now we have enough stuff that we might actually want to play the game we’ve made. To do this, go to Build > Test Play in the menu. Your game should come up in your browser:
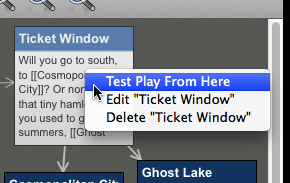
You can also start the game from an arbitrary passage by ctrl+clicking (or right-clicking) on the passage in the Twine editor and selecting “Test Play from Here.” This is helpful when you want to test just a small part of your game and not the whole thing.
You can delete a passage from your Twine by ctrl+clicking (or right-clicking) on a passage and selecting “Delete.” Any passages that link to the passage you just deleted will show a tiny ‘!’ icon to show that they have a broken link:
Changing the name and author of the story
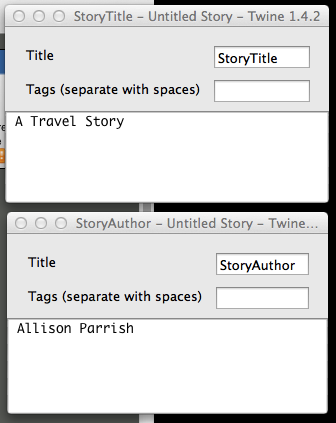
You might have noticed that there are two weird “passages” already in our
game, called StoryTitle and StoryAuthor. These passages aren’t a part
of the game itself; they’re special passages that Twine uses for a special
purpose, which is to let you specify the name of your game and the name of
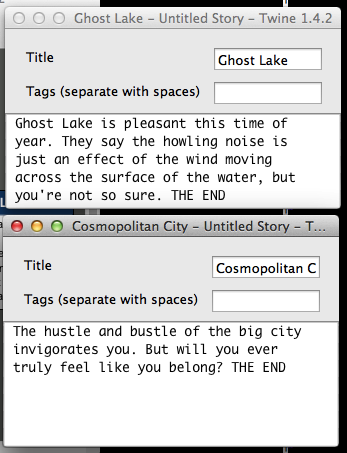
its author (respectively). Edit these passages like this (using your own
title and name, of course):
Now your test play should reflect the new information:

Saving and sharing your game
At this point, you might want to actually save your work. Go to File > Save
and pick a file name. (You should do this often! The Twine application is kind
of crashy.)
The file you create when you “Save” is a .tws file, which is a kind of
file that Twine needs to store all the information in your game, along with
information like the position of the nodes in the GUI.
If you want to share your game with other people, you need to “build” it as
HTML. Do this with Build > Build Story... This step will create an actual
HTML file. You can upload this file wherever you want, and anyone with a web
browser can play it!
If you don’t have somewhere on the web to upload your file, try:
- Neocities: free general web hosting with a friendly interface
- Philome.la: specifically tailored to Twine (sign in with Twitter, click to upload)
Adding an image to your story
It’s easy to add an image to your Twine story. Just find an image on the Internet or on your computer and drag it into your Twine game window, like so:

(Make sure you’re only using images that you have permission to use!)
Adding an image creates a new “passage” in the story. You can’t link to this passage directly, but you can use it to include the image another passage, with special syntax that looks like this:
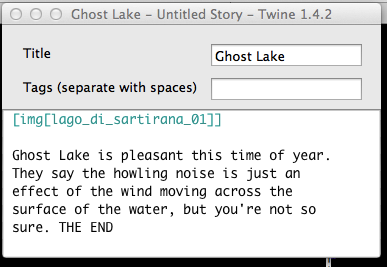
The syntax works like this:
[img[image_name]]
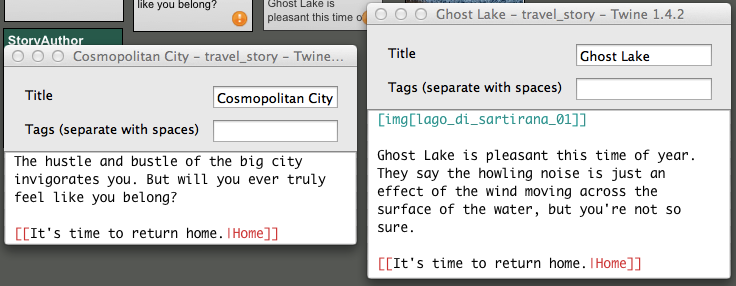
… where “image name” is the name of the image you want to include. The image’s name is the string of characters you see at the top of the image’s “passage”:
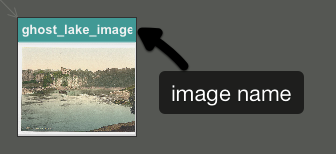
If you dragged the image in from a folder on your computer, or from the web, it might have a weird and incomprehensible name that you don’t like. Fortunately, you can change the image name if you want; just double-click on the image passage, and then edit the “Title” field:
If you change an image’s name, though, you’ll have to go back and fix all of the passages where you embedded the image.
Making decisions with history
Let’s add one more passage to our story. Instead of each destination being an ending to the game, we’ll link both to a passage about the player returning home from their trip:
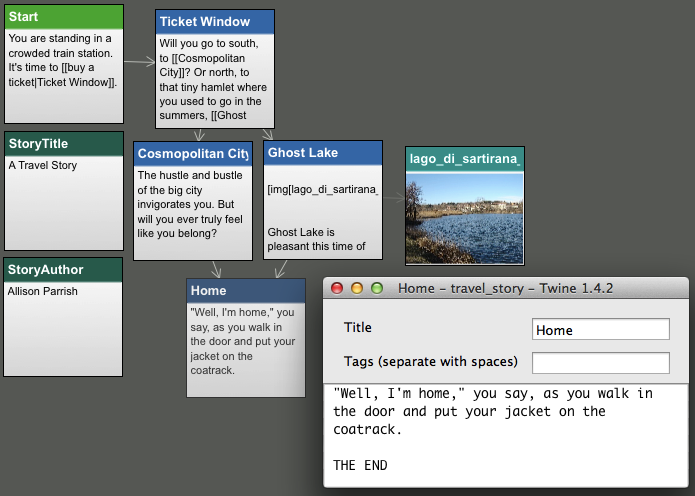
 Here’s a screenshot of the new game structure, along with some text for the
“Home” passage:
Here’s a screenshot of the new game structure, along with some text for the
“Home” passage:
This is nice, but ideally the narrator of the story would seem somehow changed by the experience of their travels. Fortunately, Twine gives us a way to conditionally display text on a page, based on whether or not the player’s actions during play meet certain criteria. The easiest way to do this is with the following bit of text:
<<if visited("name_of_passage")>>\
... this text will only show up if the player has visited the passage
named above
<<endif>>\
Don’t worry about the specific structure of this for now. You can cut and paste
this text verbatim into your own passage. But you should do two things: (1)
change the text between the quotes (name_of_passage) to the name of the
passage in your own story that you want to check for (e.g., Ghost Lake); and
(2) change the text in between the lines beginning with << to text of your
own devising. This text will only show up in your game if the player has
visited the passage named in between the quotes.
Make sure to keep the backslashes (
\) as-is. If you leave them out, you’ll see extra empty lines around where the conditional text would have shown up.
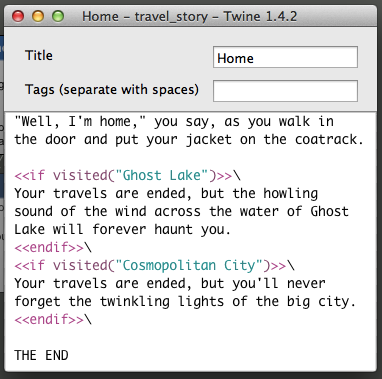
Here’s the change I made to our example game:
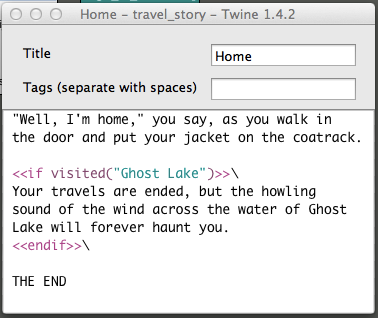
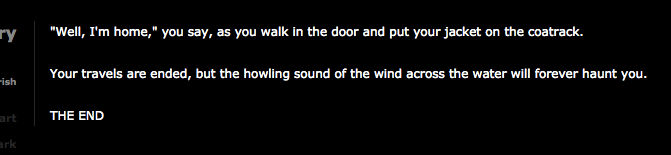
Now, if the player chooses to visit Ghost Lake during their playthrough, they’ll see this at the end of the game:
But if they don’t visit Ghost Lake, they’ll see this:

Of course, nothing is stopping you from including multiple visited checks
in the same page:
Twine supports much more sophisticated means of responding to the player’s
actions over the course of their playthrough (see the Wiki for a full
reference). But you can do surprisingly
sophisticated things (e.g., inventory puzzles) just using
<<if visited("...")>>/<<endif>>.
Randomized text with either
Text that says the same all the time is so 20th century (or earlier). Wouldn’t
it be great if our Twine game could show different text, randomly chosen,
every time someone played the game? It might be a good way to add flavor to
the game, and to provide incentive to play the game more than once. Fortunately,
Twine makes it easy to do just this with the either function.
Here’s how it works. Cut and paste the following text into a passage in your game.
<<print either("this", "that", "yonder")>>
Again, don’t worry about the specifics of how this is structured—think of it
as a Mad Lib with parts you can swap out. In particular, you should replace the
words this, that and yonder with words of your own choosing (taking care
to not accidentally erase the quotes). For example, here’s a variation on the
“Start” passage of our example game:
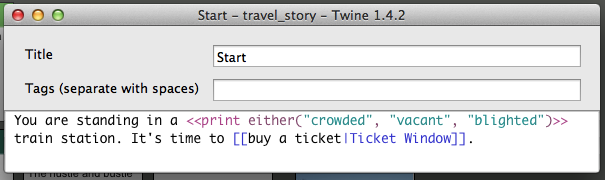
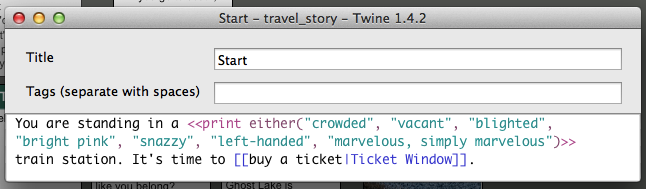
Now, whenever someone plays the game, there’s a 33% chance that they’ll see the sentence “You are standing in a crowded train station”; a 33% chance they’ll see “You are standing in a vacant train station”; and a 33% chance they’ll see “You are standing in a blighted train station”. You can include more than three possibilities (or less than three!) and the percentages will change accordingly:
Formatting text and HTML
Twine has its own “markup” language, similar to MediaWiki’s markup language.
You can review the markup language here. This
markup language allows you to easily add formatting to text, like bold
(''bold'') and italic (/italic/).
Twine also allows you to embed arbitrary HTML inside of your passages.
When Twine seens something that looks HTML, it just passes the HTML right
through into the web browser. This includes inline CSS styles and <style>
tags.
Next steps
- This tutorial owes a lot to anna anthropy’s “How to Make Games with Twine”. You should read that and also her book, Rise of the Videogame Zinesters.
- The Twine Wiki has a treasure trove of reference materials and tutorials. (Stick to the tutorials about version 1.4 for now.)
- I have some preliminary notes toward a tutorial about Twine macros and variables.
- SugarCube is a “story format” for Twine that includes a number of interesting and advanced features, including cycling links
- IFDB is a fine place to find Twine games. Some of my personal favorites: Star Court by Anna Anthropy; My Father’s Long Long Legs by Michael Lutz; Depression Quest by Zoe Quinn, Patrick Lindsey, and Isaac Schankler